www.loanperformer.com

Table of Contents (Online Help)


Attaching an SQL database

Before you can be able to attach a database, you should ensure that:

Note: You can attach a copied or detached SQL Server database. When you attach an SQL Server 2012 database that contains full-text catalog files onto a SQL Server 2016 server instance, the catalog files are attached from their previous location along with the other database files, the same way they were in SQL Server 2012

How to attach an SQL database

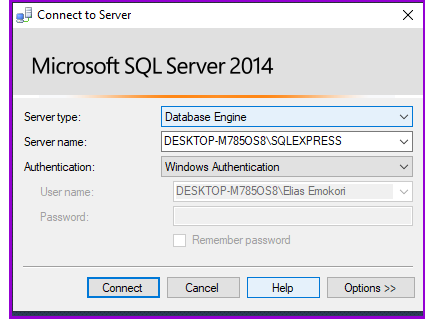
Start the SQL Server Management Studio and the following connection screen is displayed. This allows you to connect to an installed instance of SQL Server on your machine and/or the network.

Note:
1. At SQL server installation, you are provided with two options of authentications: Windows mode and Mixed (SQL server authentication and windows authentication).

2. Windows mode allows the user access to SQL resources based on his right on windows since SQL runs on windows. The system will cross check with your rights on windows and grant you access based on how much rights you have on windows.

3. Whereas the mixed mode allows the user to access SQL resources with both windows and SQL server authentications. The user is able to switch between the authentications. The system will require that you provide a System Administration (S.A) password when this option is chosen. This option would be preferable especially when spanning between networks


You may log into a specified server using either Windows or SQL Server Authentication. The database administrator should be aware of what connection mode has been set up for use.

Note:

1. For you to attach a database it should have either been detached or backed up.

2. When you detach a database in SQL Server, you are taking the database offline and removing it from the SQL Server instance from which you are detaching it.

3. The databases data and log files remain intact and are left in a consistent state so you can then attach the database at a later point or to another SQL Server instance.

4. An SQL Server instance is a complete SQL server and you can install many instances on a single machine but you can have only 1 default instance

Click on the Connect command button to connect to the server. When the connection is successful, a screen like the one below is displayed:

To attach a database, right-click the Databases folder and select the Attach.. option.

The Attach Databases screen is displayed:

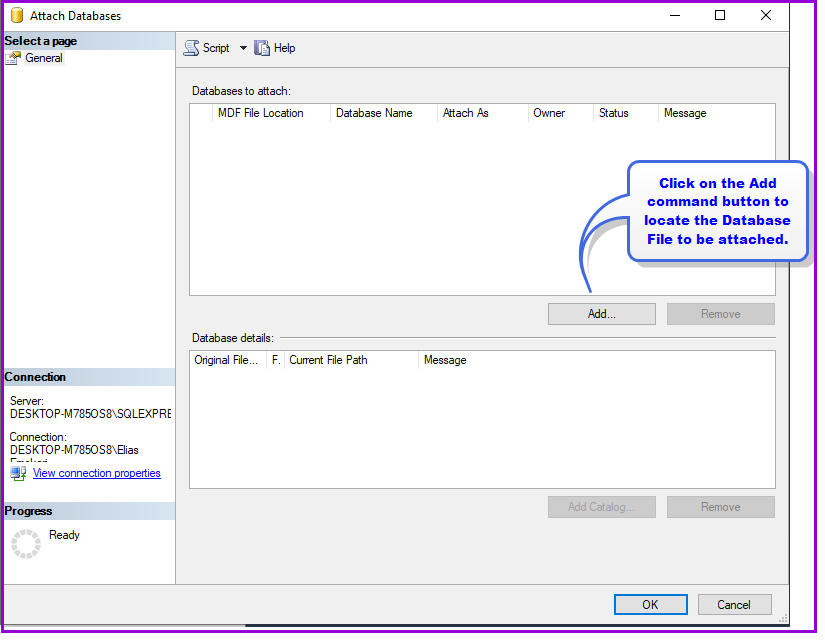
Click on the Add command button. The Locate Database File dialogue box is displayed as shown:

Using this screen, select the SQL Server database that you saved on your computer, e.g, "Demodata.MDF". You will need to be aware of where you saved the database files and the name of the .MDF file.

Note: Its advisable to copy and place the SQL database in the Data folder found in the SQL installation directory at C:\Program Files\Microsoft SQL Server\MSSQL10_50.MSSQLSERVER\MSSQL\DATA to avoid any user rights and accessibility issues that may crop up during the attachment.

Select the file and click the Ok button. You will be returned to the Attach Databases screen where the details of the selected database will be displayed.

You may, if required, attach more than one database using this screen by clicking on the Add button again.

Click Ok to attach the database.

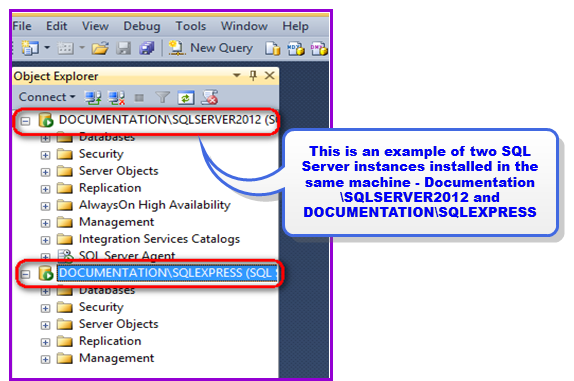
Once attached, the database will appear on the SQL Server Management Studio screen under the Databases folder as shown.

The database is now attached and will appear on the list of available databases on your Server.

How to establish the ODBC connectivity

Click on Start, then click on Control Panel. The Control panel window is displayed:

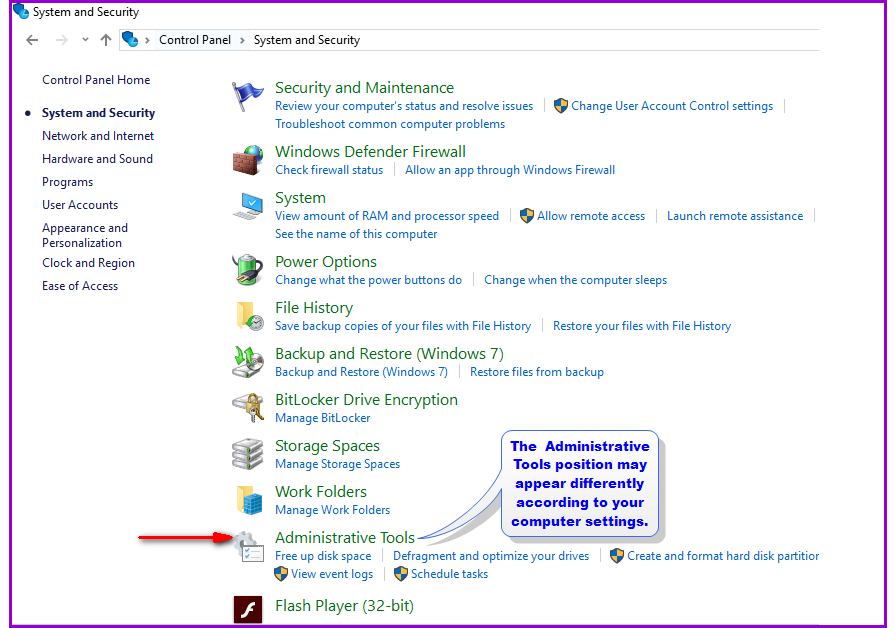
Double - click on the Administrative Tools icon. A screen like the one below is displayed:

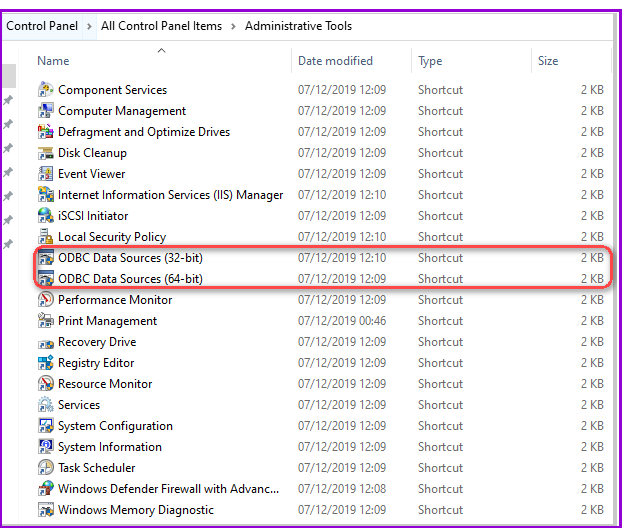
Double click on the Data Sources (ODBC) icon. The ODBC Data Source Administrator window is displayed. See below:

Note: To open the ODBC Data Source Administrator window shown above for a 64 bit machine you go to C:\Windows\syswow64 and click on the odbcad32.exe file to open the window as seen below:


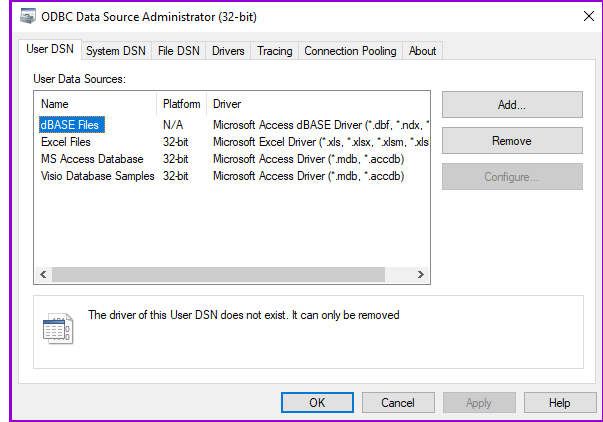
In the ODBC Data Source Administrator Window, select the System DSN tab and click on the Add command button on the right side of the screen. The Create New Data Source window is displayed.

When setting up an ODBC Data Source you have the option to set up by User DSN or System DSN. A User DSN is specific to a user on the workstation. For example, if you log on to a machine as user "David," set up a User DSN, then log off, and then log on to the machine as user "Robert", "Robert" will not see the Data Source. Why? It's specific to David's profile, not Robert's.

Conversely, if you set up a System DSN, it does not matter who logs on to the machine; all users that logon to that workstation will have access to that Data Source

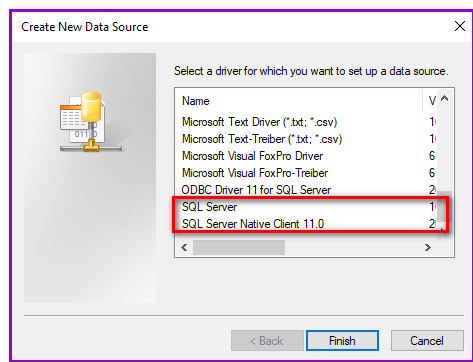
In the Create New Data Source Window, scroll all the way to the bottom of the list and click on SQL Server Native Clients 10.0.

Click on the Finish command button and the following window is displayed:


Note that For instance when you detach a database in SQL Server, you are taking the database offline and removing it from the SQL Server instance from which you are detaching it. The databases data and log files remain intact and are left in a consistent state so you can then attach the database at a later point or to another SQL Server instance.

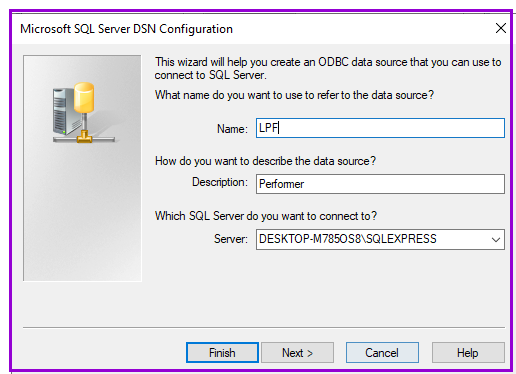
In the Create a New Data Source to SQL Server window, enter a Name for your ODBC connection, e.g., "LPF".

Enter a Description for the data source. This can be any descriptive information that you desire, e.g., "Demodata".

Enter the Server name for the SQL Server, e.g., "DAVID-PC".

Once all of the fields are entered, click on the Next button.

Click on the appropriate radio button for your connection type. If you access your SQL Server Database using your standard Windows login, keep the default option, i.e., "With Integrated Windows NT Authentication".

Note: If you access your SQL Server Database in the SQL management studio using an SQL Server Login, click on the radio button option for "With SQL Server Authentication" and enter the login details. Then, you must enter your SQL Server Login ID and Password.

Click on Next command button and the following window is displayed:

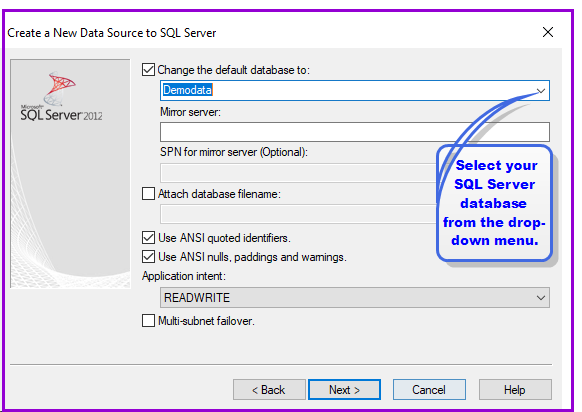
Tick the Change Default Database To: then, in the drop-down menu, select your SQL Server database name, e.g., "Demodata".

Click on the Next command button and the following window is displayed:

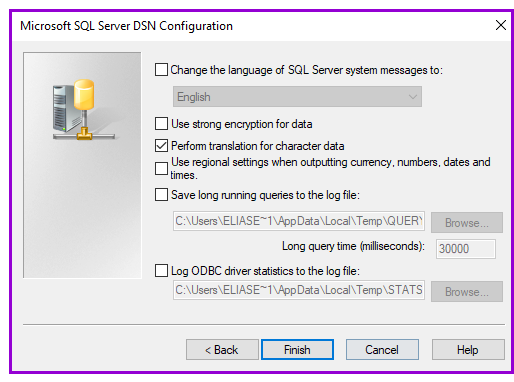
In this window, typically the default options should remain "as is" so do not change any options.

Click on the Finish button. The ODBC Microsoft SQL Server Setup window is displayed:

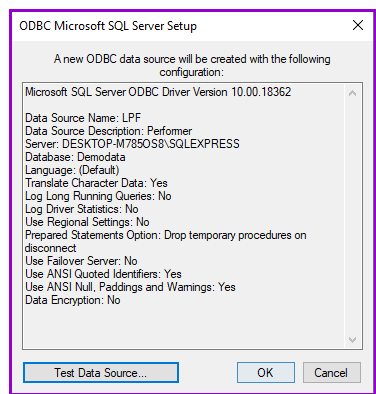
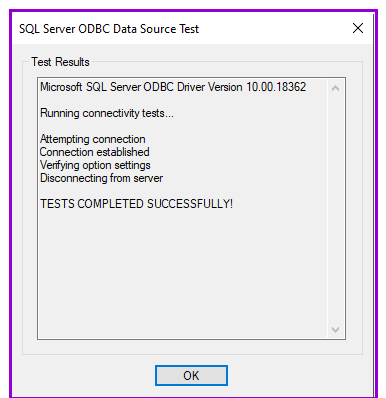
In the ODBC Microsoft SQL Server Setup Window, click on the Test Data Source button to be sure that your connection settings are correct.

Click on the OK command button to exit.

When you now log into Loan Performer (LPF), click on the SQL Server button for LPF to search for databases

existing on your network. The attached database should now appear in the Databases drop down list.

The database is now attached and will appear on the list of available databases on your Server.

Related Topics

Contact LPF live support for more information
This service requires an Internet connection.

Comment on the documentation
Crystal Clear Software Ltd appreciates your feedback. To evaluate this topic, select a corresponding score below:
Poor1 2 3 4 5 Resolved
Name: Email: Organisation:
To send your feedback to the documentation department, type your comment below and click the send button.


The Nº 1 Software for Microfinance