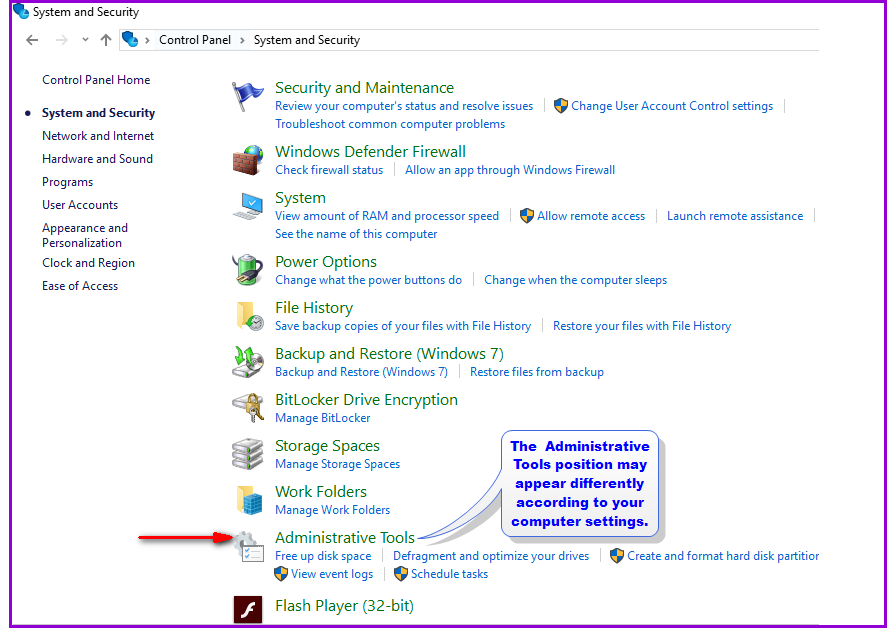
How to establish the ODBC connectivity
Click on Start, then click on Control Panel. The Control panel window is displayed:

Double - click on the Administrative Tools icon. A screen like the one below is displayed:
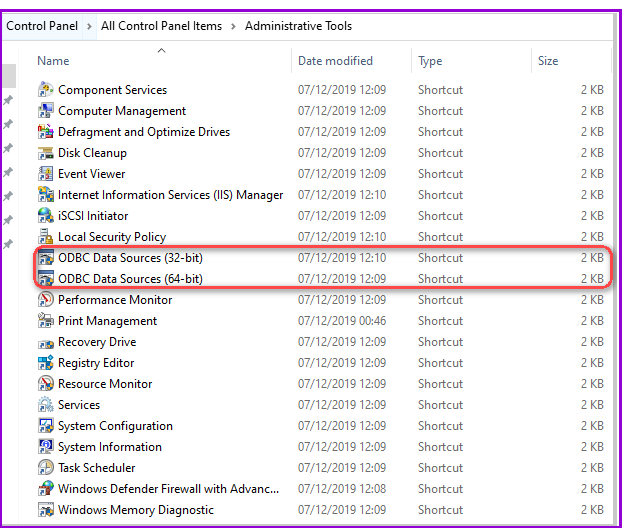
Double click on the Data Sources (ODBC) icon. The ODBC Data Source Administrator window is displayed. See below:
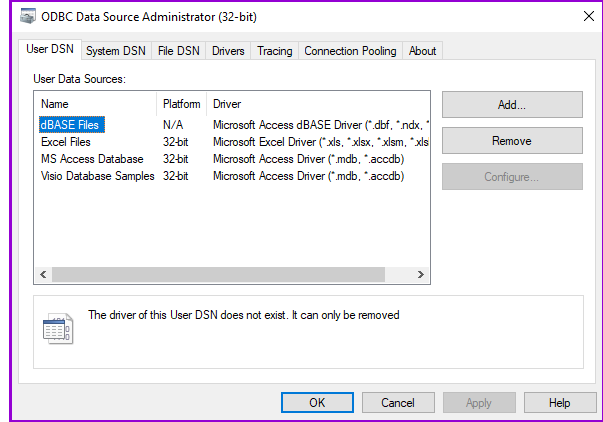
In the ODBC Data Source Administrator Window, select the System DSN tab and click on the Add command button on the right side of the screen. The Create New Data Source window is displayed.
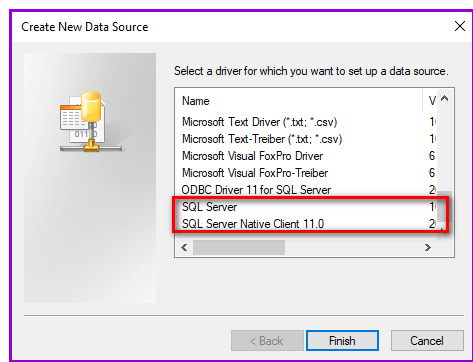
In the Create New Data Source Window, scroll all the way to the bottom of the list and click on SQL Server Native Clients 10.0.
Click on the Finish command button and the following window is displayed:
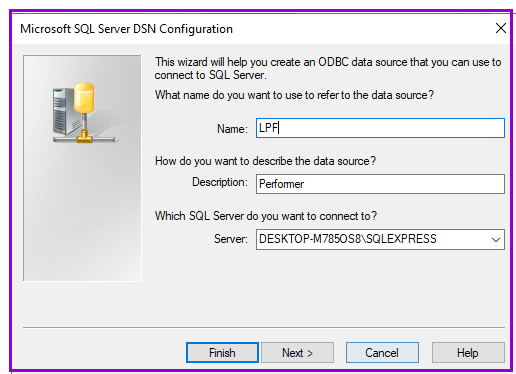
In the Create a New Data Source to SQL Server window, enter a Name for your ODBC connection, e.g., "LPF".
Enter a Description for the data source. This can be any descriptive information that you desire, e.g., "Demodata".
Enter the Server name for the SQL Server, e.g., "DAVID-PC".
Once all of the fields are entered, click on the Next button.
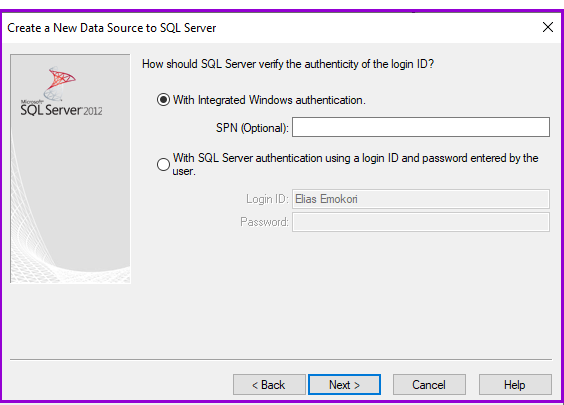
Click on the appropriate radio button for your connection type. If you access your SQL Server Database using your standard Windows login, keep the default option, i.e., "With Integrated Windows NT Authentication".
Click on Next command button and the following window is displayed:
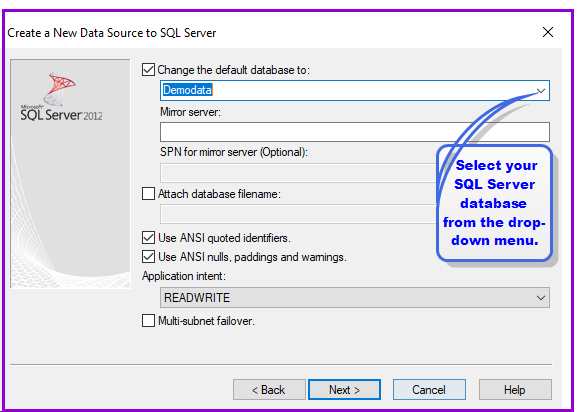
Tick the Change Default Database To: then, in the drop-down menu, select your SQL Server database name, e.g., "Demodata".
Click on the Next command button and the following window is displayed:
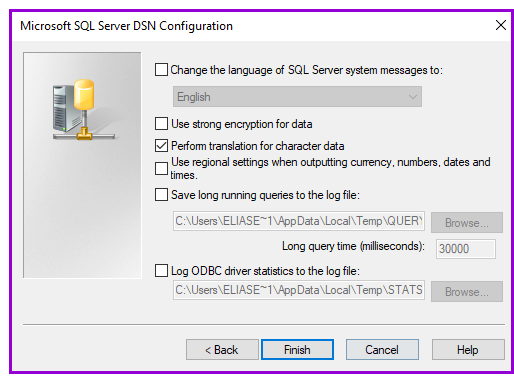
In this window, typically the default options should remain "as is" so do not change any options.
Click on the Finish button. The ODBC Microsoft SQL Server Setup window is displayed:
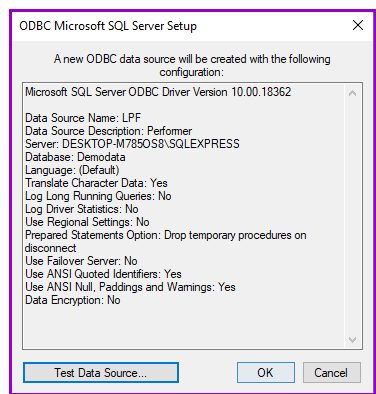
In the ODBC Microsoft SQL Server Setup Window, click on the Test Data Source button to be sure that your connection settings are correct.
Click on the OK command button to exit.
When you now log into Loan Performer (LPF), click on the SQL Server button for LPF to search for databases
existing on your network. The attached database should now appear in the Databases drop down list.
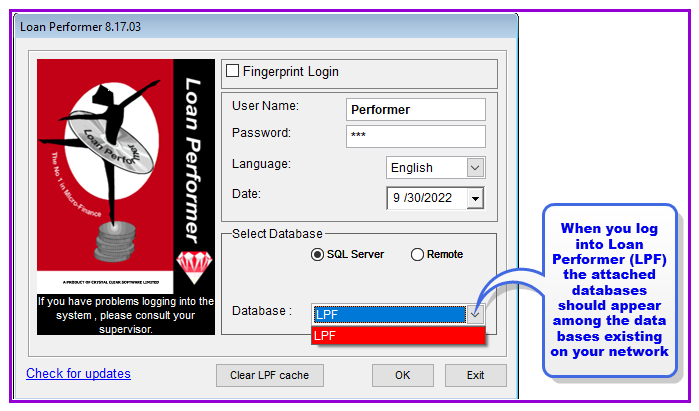
The database is now attached and will appear on the list of available databases on your Server.
The Nº 1 Software for Microfinance